Note: Depending on your enterprise configuration, access to this featured may be disabled.
To locate the Decision Frameworks , navigate to the Application Management area (gear icon in top right corner) .
Access the 'Decision Frameworks' tab from the options on the left.
You have the ability to create a framework from scratch OR you can copy/edit an inherited* framework that was passed down to your account by either Fi360 or your enterprise.
*An inherited framework can be suppressed by clicking on the three vertical dots and selecting "Suppress Framework".
How to Create a Framework from Scratch
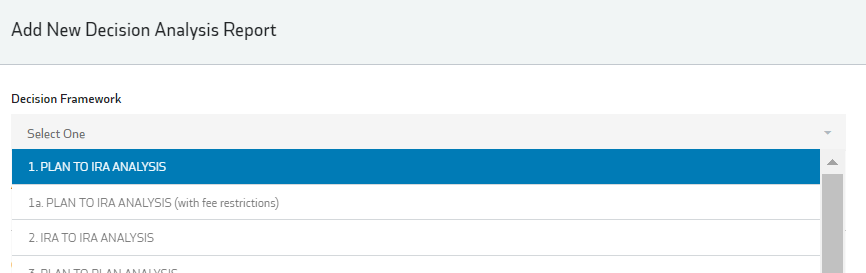
Click the blue +New Framework on the right side of the screen.

Basics
Provide a Framework Name (what appears in the dropdown when starting an analysis) and a Report Title (displays on PDF output)
Enter the information for Current Option and Proposed Option. (Ex: Stay in Plan vs. Rollover to IRA). Each option will need a Long and Short Name (8 Character limit).
Under each option, indicate whether the estimated costs and benchmark lookup features should display in COMPARE FEES modal. For example, in a Plan to IRA comparison where the Plan is the Current Option and the IRA is Proposed Option, the ideal setup is shown below. The benchmark lookup will show under the Current Option (The plan in this case) and there will be no benchmark section for the Proposed Option (the IRA). If this were a plan to plan framework though, you would likely want to select the benchmark for both options.
PDF Settings
In the PDF settings, there is an option to Include Factor Needs and Include Factor Features on the analysis PDF report (see Needs and Features explanation in Decision Factors section below). Additionally, any unselected Needs or Features can by hidden in the analysis PDF report by checking the box.
Selecting the "Include Fee Comparison" box will display the details of the fee comparison in the analysis PDF report.
Decision Factors
Create your decision factors by clicking the blue “Create Decision Factors” button.

Enter the factor name and description that will show on both the Analysis User Interface and on the PDF Analysis output. Repeat this step until all of your factors have been added.
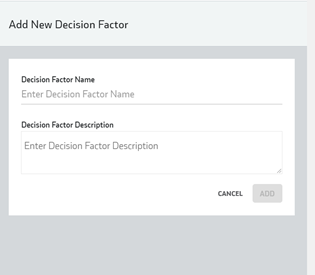
*Below is an example of how this section will reflect on the report.

Click on the Factor Name to make any desired changes, assign Factor Type or enable the COMPARE FEES button:
- Required or Optional. If left as Required (which is the default), this consideration must be included in the analysis and receive a Low, Medium or High importance to the client. If set to Optional, the Analysis will start with the consideration being set as N/A and not factoring into the recommendation. If the client does indeed feel this consideration is important to them, you can then set the Low, Medium or High importance accordingly.
- Enable Compare Fees Button. If selected (best practice is to include this once in a framework under the fees/costs consideration), a button will appear in the Analysis UI next to that consideration so you can open and complete the Cost Modal (described in Getting Started with Decision Optimizer
- Needs - Pre Defined Investor Needs can be entered and/or a free form text option can be enabled.
- Features - Pre Defined Current Account Features can be entered and/or a free form text option can be enabled.
*You can re-order the considerations to have them flow in your desired order by grabbing the icon to the left of the title and dragging and dropping into the preferred location.

Attestation Templates
Add the attestation language/ disclosures that appear in the client PDF after the Analysis summary. You can modify the language for two template types (Advice - a recommendation to rollover was provided; and No Advice - a recommendation to rollover was not given).
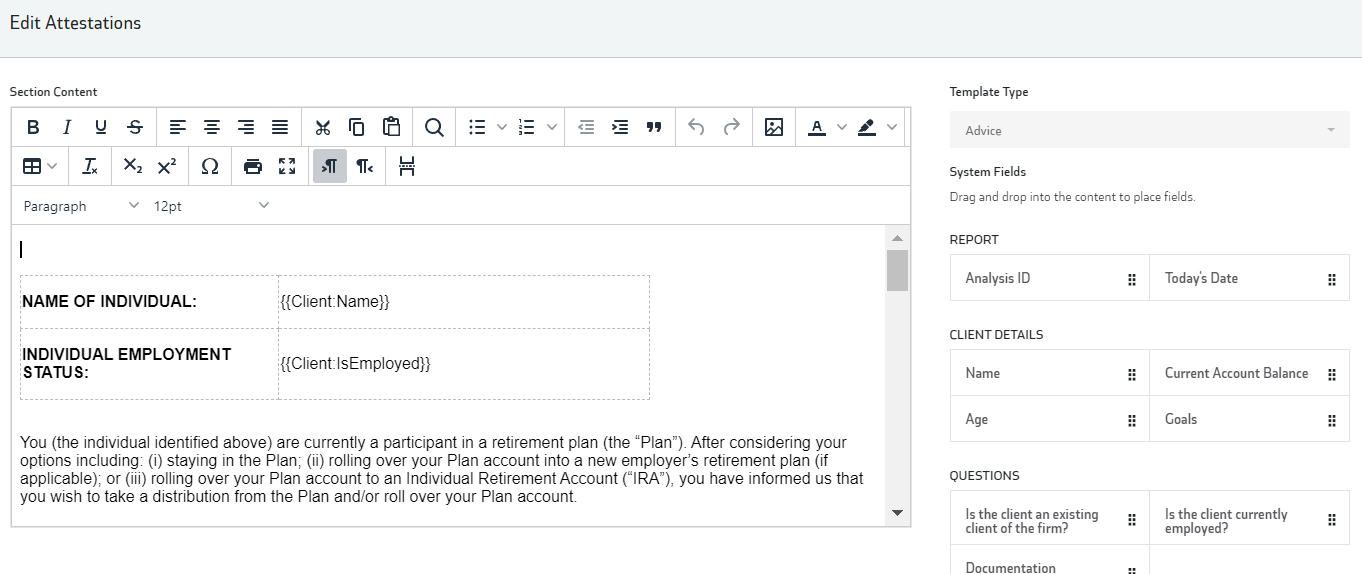
In addition to editing the text and adding any formatting, tables, images, you can also drag and drop System Fields into your desired locations within the document. When the client PDF is generated, these system fields will be populated with the corresponding data elements from that Analysis.
Available System Fields:
<Analysis ID> - Unique system ID for this analysis
<Today’s Date> - Date of the report generation
<Client Name> - Text entered in Analysis workflow
<Goals> - Multi-line text entered in Analysis workflow
<Current Account Balance> - Number entered in Analysis workflow
<Age> - Number entered in Analysis workflow
<Existing Client> - Yes or no based on response in Analysis workflow.
<Currently Employed> - Yes or no based on response in Analysis workflow.
<REQUESTED DOCUMENT TABLE> - This is the only example where it is a table that needs printed in the output with the checkboxes selected based on the user’s selections.
Items from DOL Lookup(s) (if available)
<Option 1 Benchmark Data: Employer name>
<Option 1 Benchmark Data: Plan name>
<Option 2 Benchmark Data: Employer name>
<Option 2 Benchmark Data: Plan name>
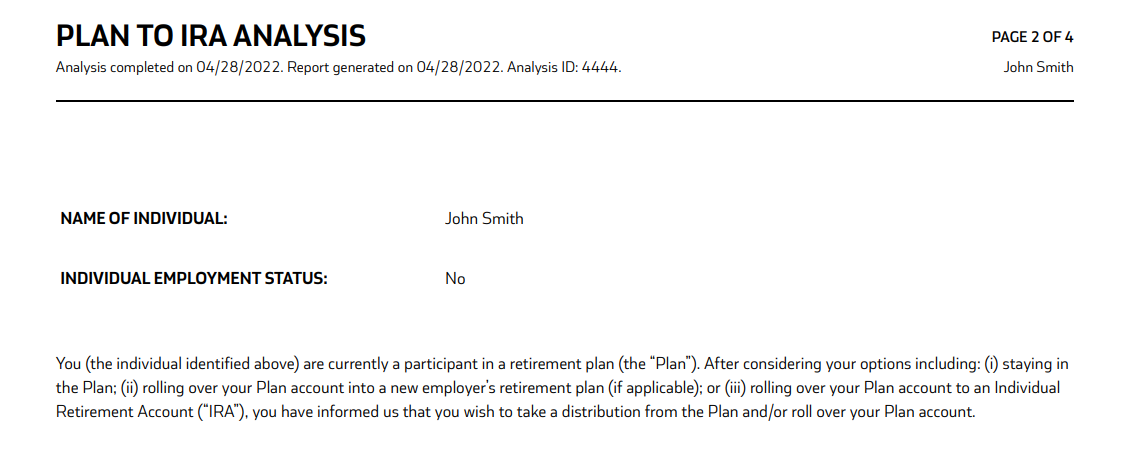
Attestation View within PDF
Other Options
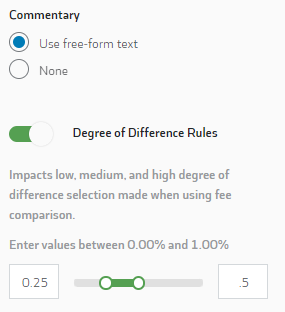
Commentary: You can choose whether you would like to allow for the use of the free form commentary box or you can remove the ability to add comments by selecting NONE
Client Goals: There is an option to toggle on client goals to the new analysis modal. Selecting the check box will require goals to be added.
Enforce Rollover Recommendation: By changing the toggle on (green), the recommendation to rollover or transfer assets is not able to be edited. The decision to stay with the current option or rollover to the proposed option will be enforced based on the analysis results.
Degree of Difference Rules: Within the Compare Fees modal, you can lock in the Low/Medium/High selection based on the difference in fees between the Current Option and Proposed Option.
Example shown below:
Low = if difference between the current option and proposed option <= x
Med = if difference between current option and proposed option > x and less than y
High = if difference between current option and proposed option >= y
X Value = 0.25%
Y Value = 0.50%
Assign a Color Scheme:
*Color Schemes can be designed on a Framework basis or saved and assigned to additional frameworks for a consistent look cross all frameworks.
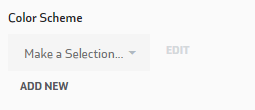
To Edit an existing Color Scheme, choose a scheme from the drop down and select EDIT
To Create a new Color Scheme, select ADD NEW
Name Color Scheme and then assign colors using RBG, HSL or #HEX identifiers for the following options:
Report Title
Section Title
Table Header Background and Font
Factor Row Background and Font
Main Body Font
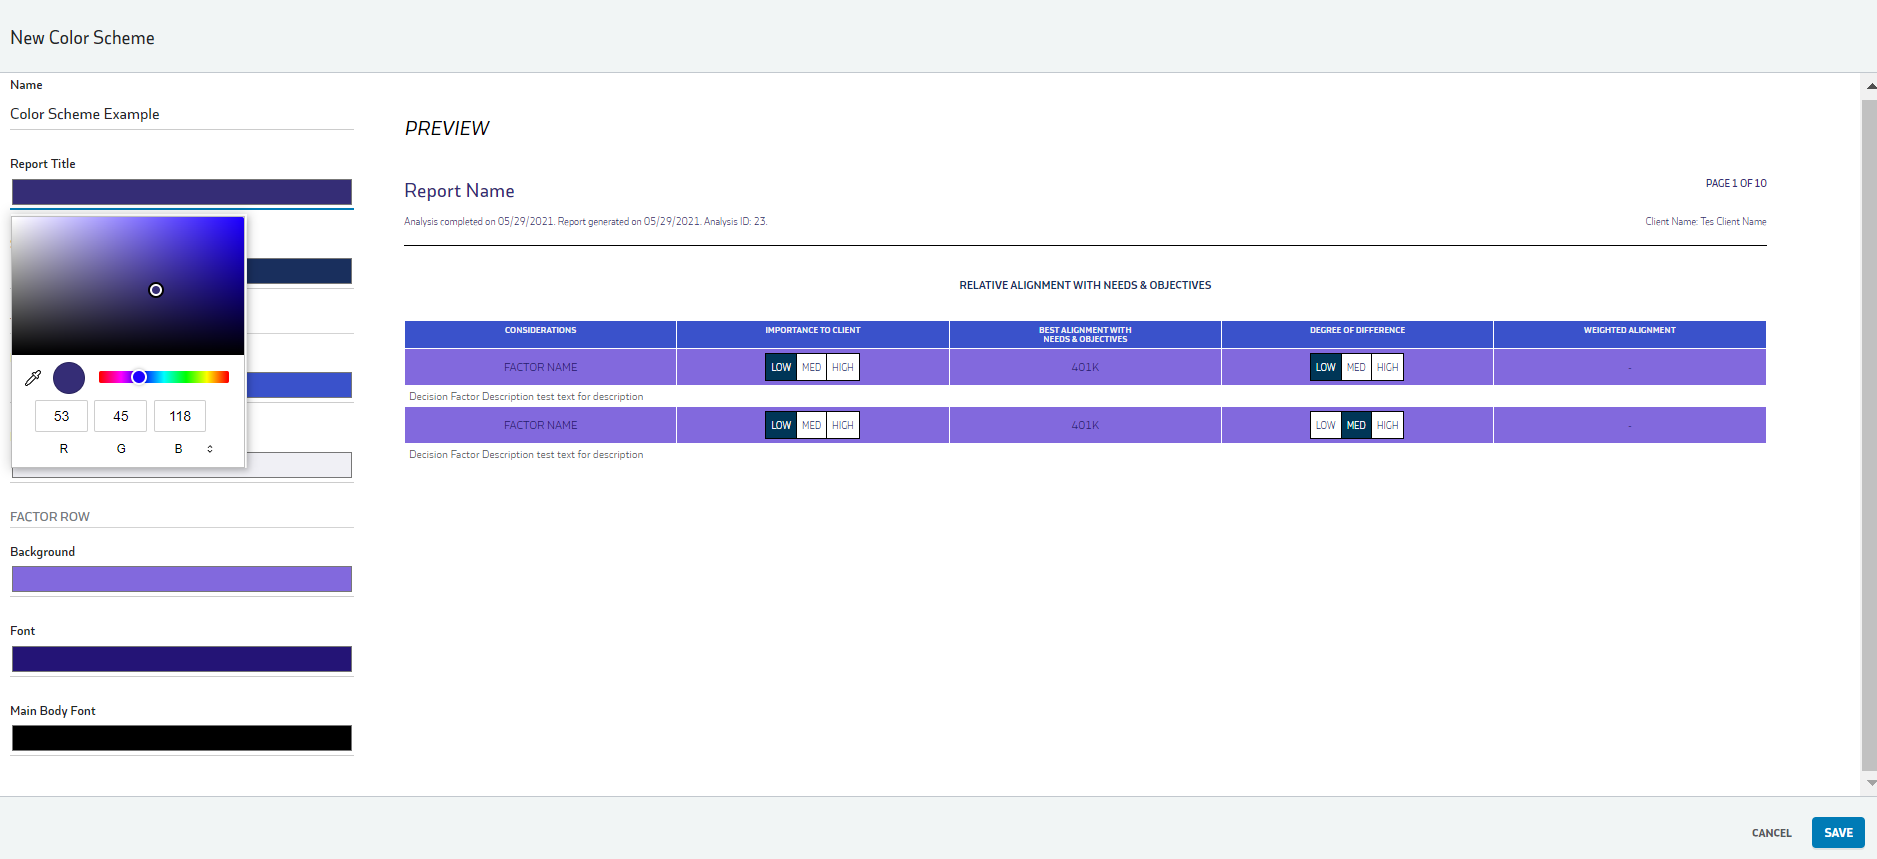
Once you have completed all of the steps click SAVE in the lower right corner.
Your custom template will then be available in the Decision Framework dropdown when you are creating your analysis. You can continue to edit this framework as needed over time.
Instructions: When a decision framework is selected in the new analysis modal, instructions can be added for the user to view.